Manual (Console)
1. Use an existing private S3 bucket
1.1 Ensure bucket privacy
Expected flags are all true. If you need to enforce them:
aws s3api put-public-access-block --bucket <BUCKET> --public-access-block-configuration \
  BlockPublicAcls=true,IgnorePublicAcls=true,BlockPublicPolicy=true,RestrictPublicBuckets=true

aws s3api put-bucket-ownership-controls --bucket <BUCKET> \
  --ownership-controls 'OwnershipControls={Rules=[{ObjectOwnership=BucketOwnerEnforced}]}'
1.2 Grant least-privilege IAM to the publisher
Attach this policy to the IAM user or role that will run publish-allure. Replace placeholders.
{
  "Version": "2012-10-17",
  "Statement": [
    {
      "Sid": "ListScoped",
      "Effect": "Allow",
      "Action": ["s3:ListBucket"],
      "Resource": "arn:aws:s3:::<BUCKET>",
      "Condition": { "StringLike": { "s3:prefix": ["<PROJECT>/*"] } }
    },
    {
      "Sid": "ObjectCrudScoped",
      "Effect": "Allow",
      "Action": [
        "s3:GetObject",
        "s3:PutObject",
        "s3:DeleteObject",
        "s3:CopyObject",
        "s3:PutObjectTagging",
        "s3:GetObjectTagging"
      ],
      "Resource": "arn:aws:s3:::<BUCKET>/<PROJECT>/*"
    }
  ]
}
Typical values:
<PROJECT>is your logical project likepayments.
2. New minimal private bucket instead
If you do not have a bucket yet:
export AWS_REGION=eu-west-1
aws s3api create-bucket --bucket <BUCKET> --region $AWS_REGION \
  --create-bucket-configuration LocationConstraint=$AWS_REGION

aws s3api put-public-access-block --bucket <BUCKET> --public-access-block-configuration \
  BlockPublicAcls=true,IgnorePublicAcls=true,BlockPublicPolicy=true,RestrictPublicBuckets=true

aws s3api put-bucket-ownership-controls --bucket <BUCKET> \
  --ownership-controls 'OwnershipControls={Rules=[{ObjectOwnership=BucketOwnerEnforced}]}'
Then attach the IAM policy from section 1.2 to your publisher principal.
2.5 CloudFront + S3 Creation Order (Important)
When setting up CloudFront access to your S3 bucket, follow this sequence strictly to avoid invalid SourceArn references.
Step 1 – Create or identify your S3 bucket
Ensure your private bucket exists and has public access fully blocked. Do not yet attach any CloudFront-related policy.
Step 2 – Create your CloudFront distribution
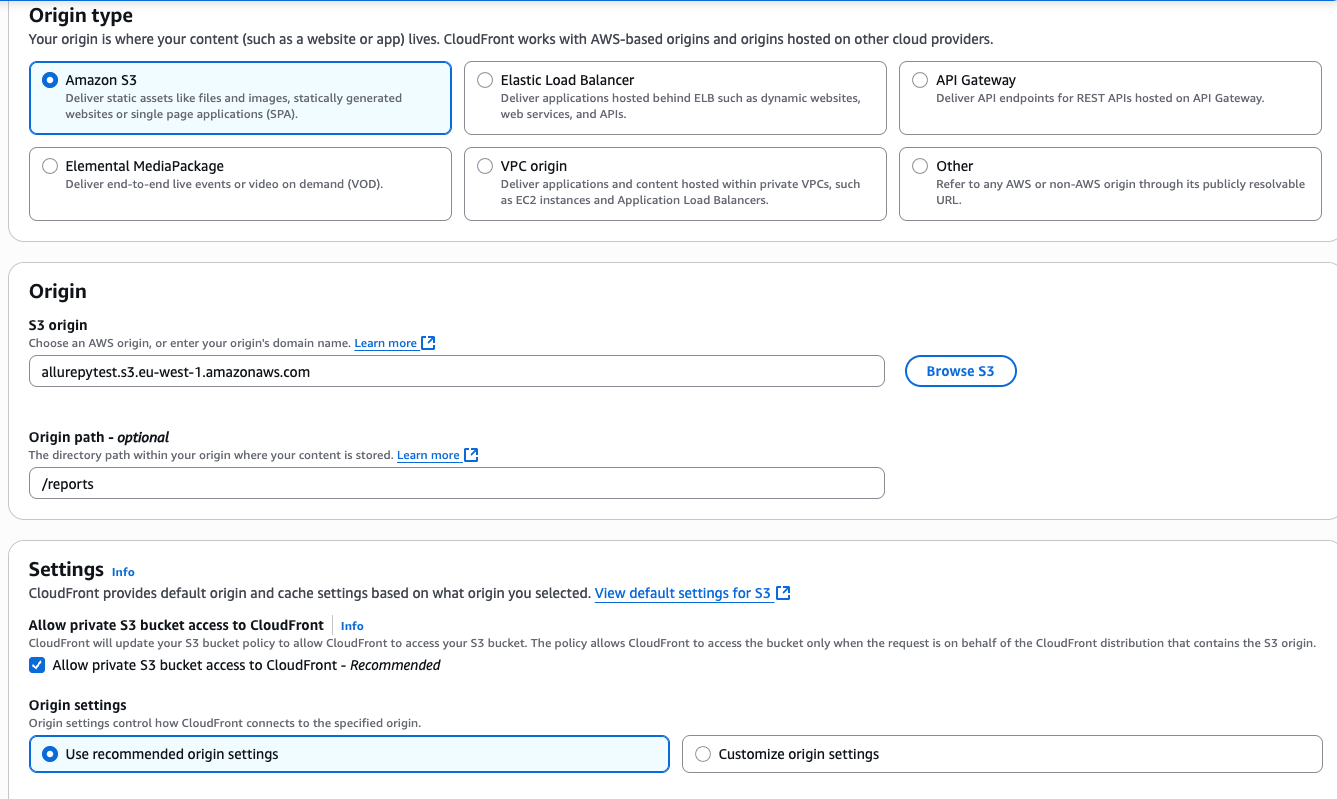
- Set the origin domain as the bucket’s REST endpoint, e.g.
bucket-name.s3.eu-west-1.amazonaws.com. - Use Origin Access Control (OAC) (not OAI).
- Record both the distribution ID (shown below as
<DISTRIBUTION_ID>) and the distribution ARN (e.g.arn:aws:cloudfront::<ACCOUNT_ID>:distribution/<DISTRIBUTION_ID>). Use your actual generated values instead of the placeholder.
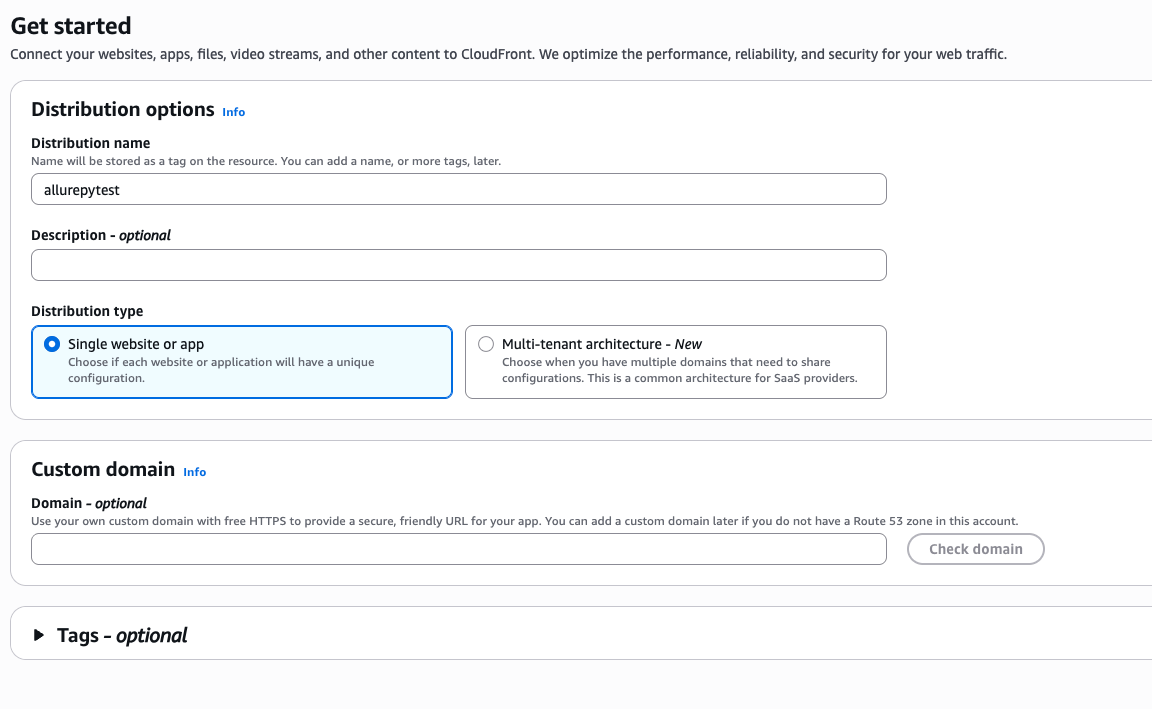
- Choose your S3 bucket as the origin domain.
- Enable Origin Access Control (OAC) to restrict access securely.
- Review default caching and security settings.
- You can leave these options as default for typical use.

- Verify all distribution settings are correct.
- Click “Create distribution” to finalize setup.
Step 3 – Verify the CloudFront read policy on your bucket
The AWS Console often auto-adds the necessary bucket policy to allow CloudFront access. You should verify this policy exists and tighten it if needed to restrict access to your distribution’s ARN. Below is an example policy to add if missing or to tighten:
{
  "Sid": "AllowCloudFrontServicePrincipalRead",
  "Effect": "Allow",
  "Principal": {
    "Service": "cloudfront.amazonaws.com"
  },
  "Action": "s3:GetObject",
  "Resource": "arn:aws:s3:::<BUCKET>/*",
  "Condition": {
    "StringEquals": {
      "AWS:SourceArn": "arn:aws:cloudfront::<ACCOUNT_ID>:distribution/<DISTRIBUTION_ID>"
    }
  }
}
Step 4 – Test connectivity
Run:
Confirm the SourceArn matches your current CloudFront distribution. Replace if you recreate the distribution.
CloudFront UI Setup
The following steps walk through CloudFront + OAC configuration in the AWS Console.
3. Optional CloudFront with OAC
Use CloudFront if you need a friendly HTTPS viewer URL and SPA routing support.
3.1 Create distribution and OAC
- Origin domain: the S3 bucket REST endpoint like
BUCKET.s3.eu-west-1.amazonaws.com - Origin access: Origin Access Control enabled
- Compress objects: on
3.2 Bucket policy to allow CloudFront reads
Add alongside your existing bucket policy statements:
{
  "Sid": "AllowCloudFrontOAC",
  "Effect": "Allow",
  "Principal": { "Service": "cloudfront.amazonaws.com" },
  "Action": "s3:GetObject",
  "Resource": "arn:aws:s3:::<BUCKET>/*",
  "Condition": {
    "StringEquals": {
      "AWS:SourceArn": "arn:aws:cloudfront::<ACCOUNT_ID>:distribution/<DISTRIBUTION_ID>"
    }
  }
}
3.3 CloudFront error response mapping for SPA
Configure error responses:
- 403 to
/index.htmlwith response code 200 and TTL 0 - 404 to
/index.htmlwith response code 200 and TTL 0
This makes deep links such as #/graphs work.
4. First run
Create a minimal allure results folder:
Dry-run preflight:
publish-allure \
  --bucket <BUCKET> \
  --prefix <PROJECT>/<BRANCH> \
  --project <PROJECT> \
  --branch <BRANCH> \
  --cloudfront https://<CF_DOMAIN> \
  --check --dry-run \
  --summary-json plan.json
Inspect plan.json, then perform a real publish:
publish-allure \
  --bucket <BUCKET> \
  --prefix <PROJECT>/<BRANCH> \
  --project <PROJECT> \
  --branch <BRANCH> \
  --cloudfront https://<CF_DOMAIN>
Open in the browser:
https://<CF_DOMAIN>/<PROJECT>/<BRANCH>/latest/
https://<CF_DOMAIN>/<PROJECT>/<BRANCH>/runs/index.html
https://<CF_DOMAIN>/<PROJECT>/<BRANCH>/runs/trend.html
5. Verification and common pitfalls
- 301 redirect: your client region does not match the bucket region. Export the correct
AWS_REGION. - 403 via CloudFront: OAC not trusted or SourceArn does not match. Fix the bucket policy.
- SPA deep link blank: add 403 and 404 error mappings to
/index.html. - Trend missing after first publish: a second publish will show a trend once history exists and
ListBucketis allowed on the prefix.
6. Optional lifecycle and KMS
Lifecycle
Tag objects with ttl-days using the CLI flag and pair with an S3 lifecycle:
aws s3api put-bucket-lifecycle-configuration --bucket <BUCKET> --lifecycle-configuration '{
  "Rules": [
    {
      "ID": "expire-old-runs",
      "Filter": {"Prefix": "<PROJECT>/"},
      "Status": "Enabled",
      "Expiration": {"Days": 90}
    }
  ]
}'
KMS
If your bucket enforces SSE-KMS, grant the publisher role minimal CMK permissions and run with:
Return to prerequisites & quick reference in setup.md or choose another method: AWS CLI